English
 العربية
 Nederlands
 Français
 Deutsch
 Italiano
 日本語
 한국어
 Polski
 Português
 Русский
 Español





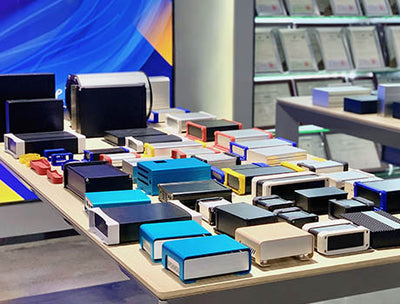
Making a custom electronic enclosure is not a one-step machining job — it is a five-stage development path from requirements to mass production, and the choices made in the first three stages decide whether the finished enclosure ships on time at the right cost. This guide walks through that path from a B2B manufacturing perspective: how to define requirements, choose between CNC, sheet metal, extrusion and 3D printing, design for manufacturability, prototype, and scale to production. If you would rather skip the engineering back-and-forth, the custom enclosure service and design service cover the whole pipeline in-house.

Custom Enclosure Development Overview
A production-ready custom enclosure follows five stages. Each stage has a deliverable you should expect from a manufacturer, and each stage catches a different class of mistake: Stage 1 (requirements) catches fit errors, Stage 2 (process choice) catches cost errors, Stage 3 (design for manufacturing) catches tolerance errors, Stage 4 (prototyping) catches real-world fit errors, and Stage 5 (production scaling) catches volume and supply errors. Skipping any stage is how projects end up with beautiful prototypes that cannot be replicated at 1,000 units.
The same five stages map to a typical timeline: requirements and design review in 1–2 weeks, prototyping in 2–3 weeks, validation in 1–2 weeks, and production tooling/first articles in 3–6 weeks. YONGU has run this pipeline for over 20 years from its 12,000 m² factory in Jiangmen, with samples in 8–10 days and production in 15–30 days.
Step 1: Define Requirements
Before any drawing exists, write down the seven parameters that drive every downstream decision. A manufacturer can quote accurately only when these are fixed:
Size and fit: external envelope, internal cavity, and the clearances around the PCB, connectors, heatsinks and battery cells. Material and finish: aluminum alloy (6061-T6, 6063-T5), steel (SPCC, galvanized), or stainless — plus anodize, powder coat, brushed or plated finish. Environmental protection: IP rating (IP54, IP65, IP67), salt-spray hours, UV resistance and operating temperature range. EMI/thermal: whether the chassis needs conductive gaskets and grounding, and the heat dissipation target in watts. Mounting and interfaces: rack unit (1U/2U/4U), DIN rail, panel-mount or wall-mount; connector cutouts and fan positions. Quantity tiers: prototyping (1–5 units), pilot (50–200), production (1,000+). Certifications: RoHS/REACH, UL, CE, FCC or IP test reports if required for your market. The electronics enclosure design tips guide covers the design checklist in more detail.
Step 2: Choose Manufacturing Method
The manufacturing method is the single biggest driver of unit cost and lead time, and the right choice depends on your quantity. For custom electronics enclosures in the aluminum and sheet metal world, four methods cover nearly every B2B product:
| Method | Best for | Typical volume | Setup cost | Lead time |
| CNC machining | Low volume, complex features, tight tolerances | 1–500 units | Minimal (program only) | 7–15 days |
| Sheet metal | Boxes, panels, racks, medium volume | 50–5,000 units | Low–medium (bending tools) | 10–20 days |
| Aluminum extrusion | Linear boxes, heatsink chassis, custom profiles | 100–10,000+ units | Profile die cost | 20–35 days |
| 3D printing | Form and fit prototypes only | 1–10 units | None | 1–3 days |
Volume bands are typical for aluminum enclosures; your actual break-even point depends on part size and feature complexity. Extrusion profiles follow ASTM B221 for aluminum and aluminum-alloy extruded bars, rods, wire, profiles and tubes — a useful reference when specifying the alloy and temper.
CNC Machining
CNC milling and turning cut a finished shape from a solid billet or extrusion on a multi-axis machine. It needs no dedicated tooling — just a CAD program — so it is the fastest route from drawing to metal part. Tolerances of ±0.02–0.1 mm are routine, and complex features (chamfers, pockets, threaded bosses, custom front panels) come out in one setup. The trade-off is material waste and unit cost at volume: CNC shines at low-to-mid volume, prototyping and highly customized panels. YONGU's custom CNC enclosure and CNC parts collection cover this route.
Sheet Metal Fabrication
Sheet metal starts from a flat sheet — aluminum, steel or stainless — and cuts, punches, bends and welds it into a box. Laser cutting is now standard for precision, and CNC bending gives repeatable angles. Tooling is modest (bending dies are universal across many boxes), which makes sheet metal the workhorse for rack chassis, panel enclosures and mid-volume boxes. Its weakness is form complexity: deep draws and integrated bosses are expensive. The sheet metal enclosure collection and key sheet metal enclosure design tips show the design rules (bend radius, hole-to-edge distance, flange height) that keep parts on spec.
Aluminum Extrusion
Extrusion pushes heated aluminum through a steel die to create a constant cross-section profile, which is then cut to length and CNC-machined at the ends. The profile die is a one-time cost, but once made the profile is extremely fast and cheap to repeat — which is why extruded boxes dominate linear enclosures, instrument cases and heatsink chassis. Extrusion is the right call when your product has a simple cross-section and production volume justifies the die. The aluminum extrusion enclosure and the wider aluminum enclosure collection show typical profiles, and how to process aluminum alloy enclosures covers the downstream machining.
3D Printing (Prototyping)
3D printing produces a physical part in hours with zero tooling — but in a polymer (ABS, PETG, nylon) rather than metal, and with lower dimensional accuracy. Its role in B2B enclosure development is prototyping, not production: it validates ergonomics, connector placement, assembly order and appearance before any metal is cut. It is a form-and-fit check, never a production housing. Plan to 3D print a design, iterate twice, then move to CNC or sheet metal for the metal prototype.
Step 3: Design for Manufacturing
Design for manufacturing (DFM) means designing the part so it can be made cheaply and repeatably on the chosen process. The rules differ by method, but the principles are universal: avoid tight tolerances where they are not needed, keep wall thicknesses uniform, design features around standard tooling (standard bend radii, standard drill sizes), and group similar operations to reduce setups. On extruded and CNC enclosures, that means uniform wall thicknesses (typically 1.5–3 mm for aluminum), corner radii that match the tool, and screw bosses with enough material around the thread.

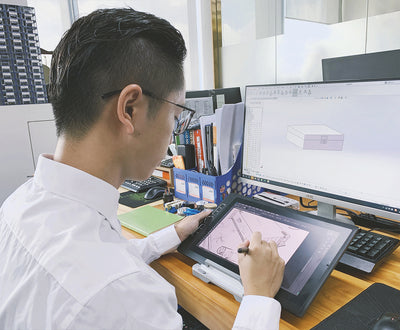
A practical DFM check list before tooling: can the part be ejected/bent without jamming? Are holes at least 2× material thickness from a bend? Are tolerances on non-critical faces relaxed to ±0.5–1 mm? Can assembly be done without special fixtures? Manufacturers add value here — a good DFM review from the factory catches 80% of redesigns before the first cut, which is why the design service starts with DFM feedback on your CAD rather than quoting your drawing as-is.
Step 4: Prototyping & Testing
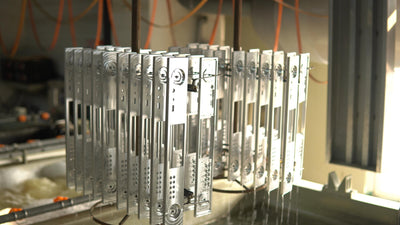
The prototype stage proves the design against reality. Expect two rounds: a first CNC or sheet metal prototype (2–3 weeks) to check mechanical fit against the actual PCB and connectors, and a second revised prototype (1–2 weeks) after fixes. Test what matters: the enclosure's fit around the PCB and connectors, the assembly order, the gasket and sealing (if IP-rated), the thermal path with a powered dummy load, and the finish after anodizing or powder coat. Capture every deviation as a drawing revision — not a verbal note — so the production drawing reflects the validated design.

For IP and EMI claims, the prototype should also be tested against the target rating: an IP67 enclosure needs immersion testing, and EMI claims need seam and gasket resistance checks. Keep the test reports with the drawing; they become the production acceptance criteria.
Step 5: Production Scaling
Moving from prototype to production is where volume economics change. CNC prototypes have no tooling cost but high unit cost; extrusion or sheet metal production adds a one-time die or bending setup cost but drops unit cost sharply at 500–1,000 units. Plan the production step deliberately: lock the drawing (ECN-controlled), confirm the surface treatment process (anodize, powder coat, silk screen), agree the first-article inspection, and set the production forecast that justifies the tooling investment.
Typical B2B milestones: prototype at 1–5 units, pilot run at 50–200 units (validates the process, packaging and inspection), and production at 1,000+ units. Sample lead time is 8–10 days; production runs 15–30 days after drawing lock. The custom enclosure size service and custom aluminum enclosure introduction cover how size and material choices feed the production quote.
Working with a Custom Manufacturer
The right manufacturer does not just machine your drawing — they give DFM feedback, hold the drawing under revision control, supply first-article reports and RoHS/REACH documentation, and scale predictably from 5 to 5,000 units. Practical questions to ask at RFQ: what is the minimum order quantity (YONGU has no MOQ on standard CNC and extrusion builds)? What is the sample lead time? Does the quote include surface treatment and silk screen? How are drawing revisions handled? What certifications can be supplied with production? Answers to these questions separate a one-off prototype shop from a production partner.
Upload Your Drawings — Get a Free DFM Review & Quote
Send your STEP/DWG, target quantity and finish — our engineers reply within 1 working day with DFM feedback, sample lead time and production pricing. No MOQ on custom builds.
Samples 8–10 days · production 15–30 days · US delivery via DHL/UPS/FedEx 7–15 days · RoHS/REACH and IP test reports supplied with quote
FAQs
What is the best way to make a custom electronic enclosure for low volume?
For 1–500 units, CNC machining of aluminum billet or extrusion is usually the best route: no tooling cost, fast lead time (7–15 days), and tight tolerances. 3D printing is only for form-and-fit prototypes, not production enclosures.
When should I use sheet metal vs extrusion for an aluminum enclosure?
Sheet metal is right for boxes, panels and rack chassis with moderate complexity and medium volume (50–5,000 units). Extrusion is right for linear profiles, instrument cases and heatsink chassis at higher volume (100+ units) — the profile die cost pays back once the volume justifies it.
How much does it cost to make a custom enclosure?
There is no single price: a CNC prototype runs higher per unit with zero tooling, while extrusion production adds a one-time profile die cost but drops unit cost sharply at 500–1,000 units. Send your STEP/DWG, material, finish and quantity for a fixed quote with sample and production tiers.
How long does it take to develop a custom enclosure from idea to production?
Typical B2B timeline: requirements and design review in 1–2 weeks, first CNC prototype in 2–3 weeks, revised prototype in 1–2 weeks, and production first article in 3–6 weeks — about 8–14 weeks end to end, with YONGU samples in 8–10 days and production in 15–30 days after drawing lock.
Do I need my own CAD designer to order a custom enclosure?
No. You can send a sketch, reference images and your PCB/connector measurements, and the manufacturer's design service will produce the 3D model, run DFM review and iterate with you until the drawing is production-ready.
What certifications should a custom enclosure supplier provide?
Expect RoHS and REACH compliance documentation as standard, plus IP test reports for waterproof enclosures and UL/CE/FCC certificates where your product needs them. A production supplier provides these with the quote, not on request after delivery.