alumina prices ·
aluminium amplifier chassis ·
aluminium card cases ·
aluminium extrusion enclosure ·
aluminium instrument enclosure ·
aluminium instrument enclosures ·
Aluminiumkasten ·
Aluminum Alloy ·
Aluminum alloy parts ·
aluminum battery box ·
din rail ·
din rail adapter ·
din rail box ·
din rail circuit breaker ·
din rail enclosure ·
din rail mount ·
din rail mounting ·
din rail power supply ·
din rail terminal blocks ·
terminal block din rail ·
terminal blocks din rail ·
When You Want To Build a Din Rail Enclosure, You Need To Have a Good Understanding Of What’s Involved And How You Can Ensure That It Will Work The Way You Want It To.
“I’m Going To Give You Some Real World Solutions On How To Make Money By Building a Custom Din Rail Mounting Bracket Enclosure.”
Introduction: As a Growing Company, You'Re Probably Looking For Ways To Quickly Scale Your Product And Keep Costs Low. One Great Option Is To Build Your Own Din Rail Relay Enclosure. The Din Rail Is a Standard, 2.5-Inch Wide Industrial Connector That's Used For Power And Data Cables. Most Likely, The Cable You'Re Using To Connect To Your Device Isn't Rated For Heavy-Duty Applications—Like Powering Your Entire Office. You May Have Noticed That Almost Every Electronics Device Has a Set Of Rails Built-In To Provide a Quick Way To Plug In And Get The Device Powered Up. It Makes Sense That Your Phone Would Also Benefit From a Similar Feature. Your Phone Probably Uses The Same 2.5-Inch Width And You'd Love To Have a Way To Power It. Fortunately, There Are Plenty Of Companies Out There Willing To Build a Custom Din Rail Switch For You.
1. Building Your Own Din Mounting Rail Enclosure
This Is The First Step In Building Your Own Diy Rack Mount Din Rail. You Can Either Build It Yourself, Or Buy One Of The Pre-Made Versions From a Variety Of Manufacturers. But You Can Also Build Your Own. There Are Many Different Ways To Build Your Own Din Rail Enclosure. But Whatever Your Method, The End Result Is The Same – a Custom Made Din Rail Enclosure. 2. Get The Parts You Need The First Thing You Need Is a Din Rail Enclosure.
2. Building Your Din Rail Ethernet Switch From Scratch
In a Nutshell, The Din Rail Toggle Switch Is Made Up Of Two Main Parts: The Wall (Or Panel) That Encloses The Components And The Rack Itself. I Have Been Working With Din Rail Mounting Enclosures For Over 5 Years Now. This Is My Second Enclosure. My First Enclosure Was Actually Based Off Of a Design I Saw On The Web. I Designed The One Shown Below, And It Worked Great, But It Had Some Issues. One Was That There Were Gaps Between The Individual Components Of The Enclosure. Also, The Back Panel Could Only Hold About 3/4 Of The Components, And The Back Panels Were Hard To Work With Because They Could Break.
3. Din Rail Enclosure Kits
The Din Rail Terminal Block Is a Standard Used For Mounting Electronics Such As Racks, Power Supplies, Audio Interfaces, And Data Storage Devices. They’Re Made Up Of Two Rails: One That Runs Horizontally (Usually From Left To Right) And Another That Runs Vertically (Up And Down). They Provide Plenty Of Space To Mount Components, But They Can Be Difficult To Design Around Because Of Their Rigid Layout. These Kits Offer Simple Solutions To Mounting Din Rails In a Way That Allows Room For Components To Be Mounted Without Sacrificing The Looks.
In Conclusion, This System Includes All Necessary Components To Build An Entire System In One Enclosure Including The Enclosure, All Power Supplies, The Control Board, The Led Strips, The Din Rail Bracket, And The Power Supply Cables. The Enclosure Is Made With The Same High-Quality Components As The Control Panel, And The Enclosure’s Size Is Perfect For Mounting On a Wall Or Desk. This Is The System That We Use At My Company, The Daily Design.
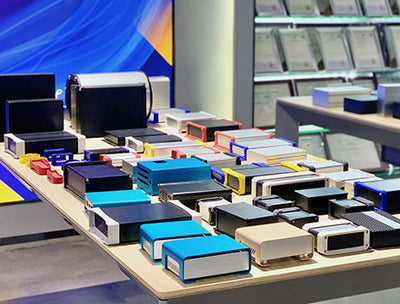
Featured Din Rail Enclosure collection
View all


Contact us
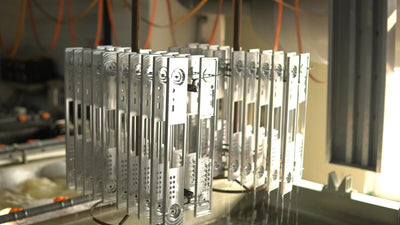
yongucase is an electronic device enclosure manufacturer with 18 years of experience, with one-stop enclosure solutions. Contact us for free samples and industrial design services!


You may also like
View all